Grilling Made Simple
Are you tired of complicated grilling techniques and endless clean-up? Look no further, because we’ve got you covered! In this blog post, we’re going to show you how to make grilling simple and hassle-free, especially when you have a grill with an ash-catcher. We understand the frustration of spending more time cleaning up than actually enjoying the delicious food you grilled. That’s why we’re here to provide you with useful tips and tricks to make your grilling experience easy and efficient. So sit back, relax, and get ready to become a grilling pro with our step-by-step instructions.
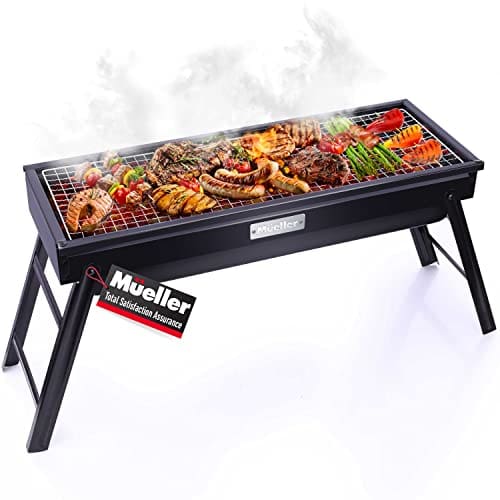
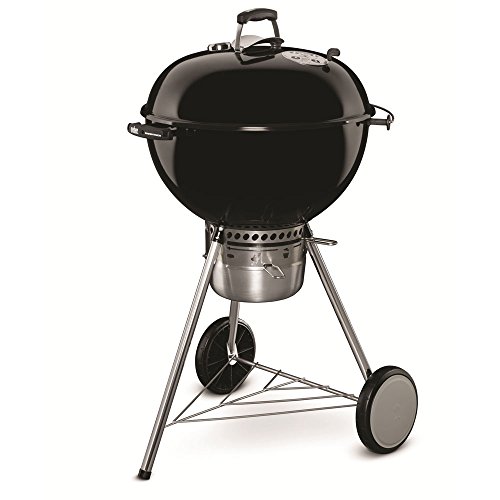
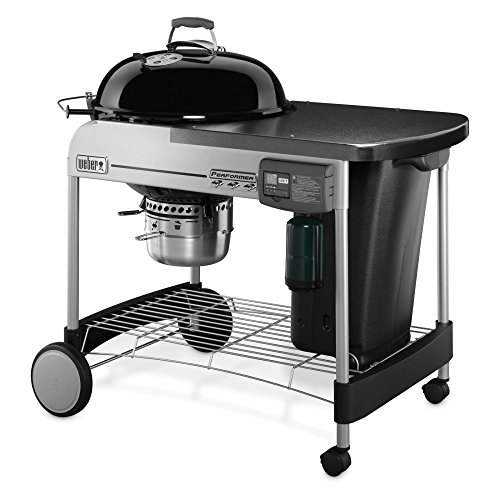
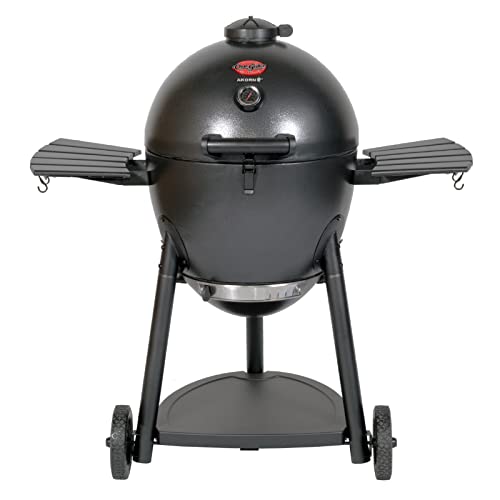
Discover the top-selling grills with convenient ash-catchers for easy cleanup


Understanding the Basics of Grilling
Grilling is a popular cooking method that allows you to enjoy delicious meals with a unique smoky flavor. Whether you are a seasoned griller or just starting out, understanding the basics of grilling is essential to achieve the best results. In this blog section, we will explore the different types of grills available and discuss the benefits of using a grill with an ash-catcher.
Types of Grills:
When it comes to grilling, there are three primary types of grills available: gas grills, charcoal grills, and electric grills. Each of these grills has its own set of advantages and considerations. Let’s take a closer look:
1. Gas Grills:
Gas grills are a popular choice among grilling enthusiasts due to their convenience and ease of use. Here are some key points about gas grills:
- Fuel: Gas grills are powered by propane or natural gas, which offers an instant heat source for quick and consistent cooking.
- Temperature Control: Gas grills usually come with adjustable knobs or controls, allowing you to easily regulate the cooking temperature.
- Convenience: Gas grills heat up quickly, eliminating the need for extensive preheating, and they are easy to clean.
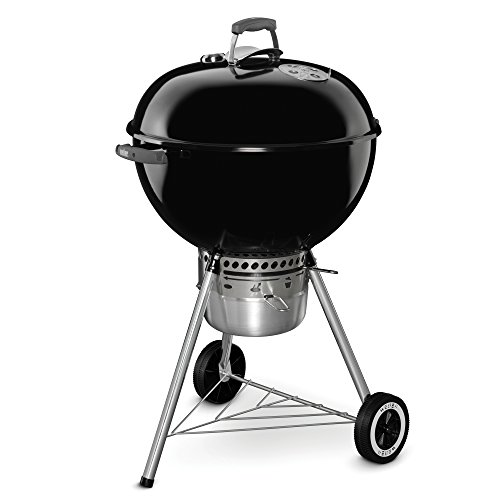
2. Charcoal Grills:
Known for their smoky flavor and versatility, charcoal grills offer a unique grilling experience. Here are some important details about charcoal grills:
- Fuel: Charcoal grills utilize charcoal briquettes or lump charcoal as their fuel source, providing an authentic smoky flavor to your grilled dishes.
- Temperature Control: Unlike gas grills, temperature control on charcoal grills can be a bit more challenging. However, with practice and proper airflow adjustments, you can achieve excellent results.
- Versatility: Charcoal grills allow for indirect grilling, smoking, and even searing at high temperatures, making them a favorite choice for grilling enthusiasts.
3. Electric Grills:
Electric grills provide an alternative grilling option for those who may not have access to gas or charcoal. Here are some key benefits of electric grills:
- Convenience: Electric grills are easy to use and require minimal setup. All you need is a power outlet, and you’re ready to start grilling.
- Indoor and Outdoor Use: As they produce no harmful fumes, electric grills are suitable for both indoor and outdoor cooking.
- Ease of Cleaning: Electric grills are often designed with removable dishwasher-safe components, making cleaning a breeze.
The Benefits of an Ash-Catcher:
Cleaning up after grilling can sometimes be a hassle, but a grill with an ash-catcher can simplify the process. Here are the key benefits:
- Efficient Ash Removal: An ash-catcher collects the ash residue from charcoal grills, making it easy to dispose of without scattering it around.
- Improved Airflow: Regular removal of ash prevents clogging and allows for proper ventilation, enhancing the grilling experience.
- Reduced Risk of Fire: Removing ash from your grill eliminates the risk of spontaneous combustion, offering a safer grilling environment.
Preparing the Grill
Before you start grilling, it’s important to properly prepare your grill to ensure a successful and enjoyable cooking experience. This section will guide you through the necessary steps, including cleaning the grill grates, checking the gas or charcoal levels, and ensuring the ash-catcher is ready for use.

Cleaning the Grill Grates
The grill grates are an essential component of your grill, and it’s crucial to keep them clean to prevent food from sticking and ensure even cooking. Follow these steps to clean your grill grates effectively:
- Preheat your grill: Turn on your grill and let it reach a high temperature. This will loosen any food remnants or debris on the grates, making them easier to clean.
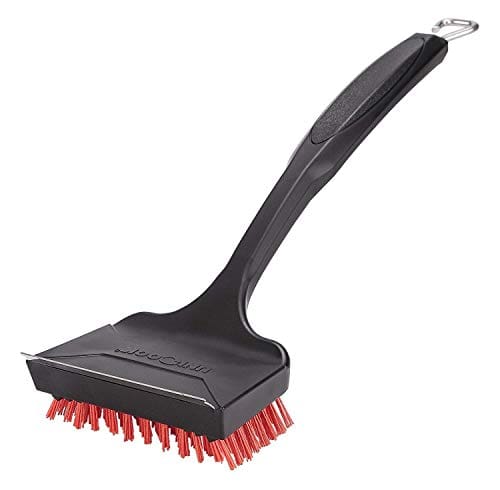
- Scrub the grates: Using a grill brush, scrub the grates thoroughly. Make sure to remove any leftover food bits or grease. For stubborn residue, you can soak the grates in warm, soapy water before scrubbing.
- Rinse the grates: Once you’re done scrubbing, rinse the grates with water to remove any soap residue.
- Dry the grates: After rinsing, let the grates air dry completely or use a clean towel to dry them before cooking.
Checking Gas or Charcoal Levels
For gas grills, it’s crucial to check the gas level before you start grilling. Similarly, if you’re using a charcoal grill, ensuring an adequate amount of charcoal is essential. Follow these steps to check the gas or charcoal levels:
Gas grills:
- Check the propane tank: If you have a propane grill, inspect the propane tank to ensure it’s not empty. Look for any visible signs of damage or leakage.
- Turn on the gas supply: Next, open the valve on the propane tank and listen for any hissing sounds. This indicates a gas leak and should be addressed before using the grill.
- Test the burners: Turn on each burner individually and check if they ignite properly. Make sure the flames are even and blue. If they are yellow or uneven, there may be an issue with your grill’s burners that needs to be addressed.
Charcoal grills:
- Check the charcoal supply: Ensure you have enough charcoal to sustain the cooking time required for your recipes. It’s recommended to pre-measure the amount of charcoal needed before starting.
- Arrange the charcoal: Once you have the required amount of charcoal, arrange it in a pyramid shape at the bottom of the grill. This allows for better airflow and even heat distribution.
- Light the charcoal: Use a chimney starter or charcoal starter to light the charcoal. Avoid using lighter fluid as it can leave a residual taste on your food.
- Wait for the coals: Let the coals burn for about 15-20 minutes until they’re covered with white ash. This indicates they’re ready for cooking.
Emptying and Preparing the Ash-Catcher
If you have a charcoal grill, it usually comes with an ash-catcher located beneath the grill grates. Emptying and preparing the ash-catcher is essential for proper airflow and to avoid any safety issues. Here’s how to do it:
- Allow the grill to cool down: If you’ve recently used your grill, make sure it has cooled down before emptying the ash-catcher. This will prevent any accidental burns.
- Remove the ash-catcher: Depending on your grill model, you can either slide out the ash-catcher or detach it. Refer to your grill’s manual for specific instructions.
- Dispose of the ashes: Empty the ash-catcher and dispose of the ashes in a fireproof container. Make sure the ashes are completely cooled before disposing of them.
- Clean the ash-catcher: Rinse the ash-catcher with water to remove any remaining residue. Dry it thoroughly before placing it back in the grill.
By following these simple steps, you’ll be well-prepared to start grilling your favorite foods with confidence. A clean grill, proper gas or charcoal levels, and an empty ash-catcher are key to achieving delicious and perfectly cooked meals. Remember, a little preparation goes a long way in ensuring a successful grilling experience.
For a quick recap, here’s a comparison table highlighting the key points of each step:
| Step | Gas Grills | Charcoal Grills |
|---|---|---|
| Cleaning the Grill Grates | Preheat, scrub, rinse, dry | Preheat, scrub, rinse, dry |
| Checking Gas or Charcoal Levels | Check propane tank, open valve, test burners | Check charcoal supply, arrange pyramid, light the charcoal, wait for white ash |
| Emptying and Preparing the Ash-Catcher | Allow grill to cool down, remove ash-catcher, dispose of ashes, clean ash-catcher | Allow grill to cool down, remove ash-catcher, dispose of ashes, clean ash-catcher |
Now that you know how to prepare your grill, you’re ready to dive into the exciting world of outdoor cooking! Enjoy and happy grilling!
Grilling Techniques and Tips
Grilling is not just about tossing some meat on a hot grill and hoping for the best. To achieve the perfect flavors and textures, it’s important to master some essential grilling techniques and follow a few expert tips. In this blog section, we will guide you through the process of grilling like a pro, from choosing the right grilling method to seasoning your meat and determining the correct grilling time for different foods.


Direct and Indirect Grilling Methods
One of the first decisions you need to make when grilling is whether to use direct or indirect grilling. Each method has its own benefits and is suitable for different types of food. Here’s a breakdown:
Direct Grilling
- In direct grilling, you cook the food directly over the heat source.
- This method is ideal for small and tender cuts of meat, such as steaks, burgers, and fish fillets.
- It provides a high heat environment that sears the meat quickly, giving it a delicious crust while keeping the center juicy.
Indirect Grilling
- Indirect grilling involves cooking the food away from the heat source, using the grill’s lid to create an oven-like environment.
- This method is perfect for larger cuts of meat, such as roasts and whole chickens, as well as delicate foods like vegetables and fish.
- It allows for slower, more even cooking, resulting in tender and flavorful dishes.
Properly Seasoning Your Meat
Seasoning your meat is essential to enhance its flavor and make it truly delicious. Here are some tips for properly seasoning your meat:
- Start with a dry brine: Salt your meat a few hours before grilling to allow the salt to penetrate and season the meat.
- Experiment with different rubs: Try combinations of herbs, spices, and other seasonings to create flavor profiles that complement your meat.
- Marinades for added flavor: Marinating your meat in a flavorful liquid can tenderize it and infuse it with delicious flavors.
- Don’t forget the resting time: Allow your meat to rest after grilling to ensure that the juices distribute evenly and the flavors settle.
Determining the Correct Grilling Time
Grilling time is crucial to achieve the perfect doneness for different types of food. Here’s a quick guide:
Steaks
- Rare: About 2-3 minutes per side for a 1-inch thick steak.
- Medium-rare: About 4-5 minutes per side for a 1-inch thick steak.
- Medium: About 5-6 minutes per side for a 1-inch thick steak.
- Well-done: About 8-10 minutes per side for a 1-inch thick steak.
Chicken
- Boneless, skinless breasts: 6-8 minutes per side.
- Bone-in pieces: 10-12 minutes per side.
- Whole chicken: 60-75 minutes, rotating every 15 minutes.
Fish
- Fillets: 3-4 minutes per side.
- Whole fish: 10-12 minutes per side, depending on thickness.
Vegetables
- Small and thin vegetables: 5-7 minutes, turning occasionally.
- Larger vegetables: 10-15 minutes, turning occasionally.
Remember, these times are just a guide. Factors such as grill temperature, meat thickness, and personal preference can affect cooking times, so it’s important to use these as a starting point and make adjustments as necessary.
By mastering these essential grilling techniques and following these expert tips, you’ll be able to elevate your grilling game and create delicious and impressive dishes that will have everyone coming back for more. Happy grilling!
Maintenance and Safety
Taking care of your grill not only ensures its longevity but also guarantees a safe and enjoyable grilling experience. In this blog post, we will guide you through important maintenance routines and safety precautions that will keep your grill operating at its best.

Regular Cleaning and Maintenance
Cleaning the Cooking Grates
- Remove any leftover food particles by using a grill brush or scraper.
- For porcelain-coated grates, use a soft-bristle brush and mild dish soap.
- Stainless steel cooking grates can be cleaned with a stainless steel cleaner to prevent corrosion.
- Rinse thoroughly with water and dry completely before reassembling.
Scrubbing the Burner Tubes
- Turn off the gas supply and disconnect the propane tank.
- Remove the cooking grates and heat shields to access the burner tubes.
- Use a wire brush to scrub away any grease or debris.
- Ensure all burner holes are clear for even heat distribution.
Checking Gas Connections
- Inspect the gas connections for any leaks by brushing soapy water onto the connection points.
- If bubbles form, tighten the connection or replace faulty parts.
- Perform this check regularly to avoid gas leaks and potential accidents.
Cleaning the Exterior
- Use warm soapy water and a sponge to clean the exterior surfaces.
- Polish stainless steel parts with a stainless steel cleaner to maintain their shine.
- Dry thoroughly to prevent rusting.
Seasoning the Grates
- After cleaning, coat the cooking grates with a light layer of vegetable oil to prevent food from sticking.
- Heat the grill for about 15 minutes to allow the oil to seep into the grates.
- Wipe off any excess oil before placing food onto the grates.
Proper Storage of Grilling Tools
Clean and Dry Tools
- After each use, clean and dry your grilling tools thoroughly.
- Moisture can cause rusting, so ensure they are completely dry before storing.
- Store tools in a dry and secure location to prevent damage and ensure they are ready for use next time.
Protecting Against the Elements
- Use a grill cover to shield your grill from the elements when not in use.
- Ensure the cover is designed for your specific grill type and fits securely.
- A good-quality cover will protect against rain, snow, and UV rays, prolonging the life of your grill.
Essential Safety Precautions
Proper Location
- Place your grill on a stable and level surface, away from any flammable materials.
- Ensure there is ample space around the grill for airflow and to prevent any accidents.
Propane Safety
- When using a propane grill, always check for leaks before ignition.
- Open the propane valve slowly to avoid a sudden rush of gas.
- If you smell gas, turn off the burners and propane tank immediately and have the grill inspected.
Fire Safety
- Keep a small fire extinguisher nearby in case of emergencies.
- Never leave your grill unattended while cooking.
- Do not pour water on grease fires; use baking soda or a fire extinguisher instead.
Cooking Safety Tips
- Use long-handled tools to avoid burns and splatters.
- Keep a reliable meat thermometer on hand to ensure food is cooked thoroughly.
- Use oven mitts or heat-resistant gloves when handling hot items.
By following these maintenance and safety practices, you can ensure that your grill remains in top shape and that grilling sessions are enjoyable and hazard-free. Keep your grill clean, take proper precautions, and get ready to create delicious meals for years to come. Happy grilling!
Conclusion: Master the art of grilling with these simple tips
In conclusion, grilling can be a breeze when you have the right tools and knowledge. By utilizing the proper techniques and investing in a grill with features like an ash-catcher, you can simplify both the grilling and cleaning processes. Don’t forget to prioritize safety and regularly maintain your grill for the best results. Now, armed with this information, go ahead and enjoy the art of grilling with confidence. Happy grilling!