How to cook different types of food on a portable grill?
This step-by-step guide will show you how to cook various types of food on a portable grill. Whether you’re a camping enthusiast or simply enjoy outdoor cooking, this guide will help you make the most of your portable grill by providing detailed instructions on how to prepare and cook different meals. You’ll learn tips and techniques to achieve delicious results every time you fire up your portable grill. So get ready to explore the versatile world of outdoor cooking and learn how to whip up tasty dishes on the go!
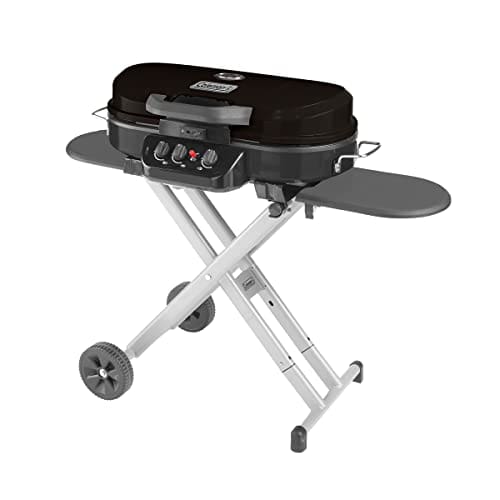
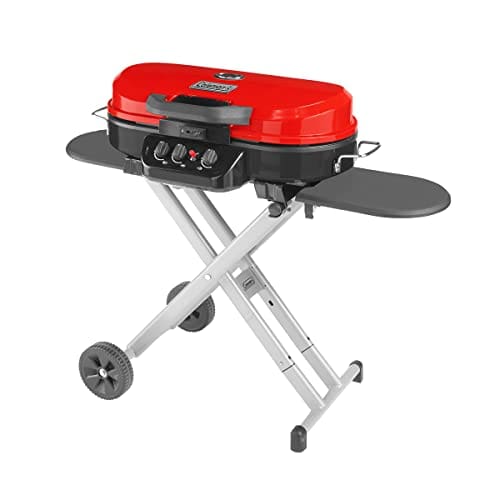
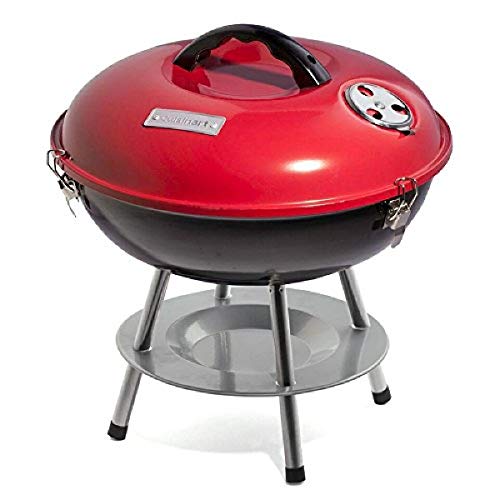
Top Portable Grill Choices for Outdoor Cooking


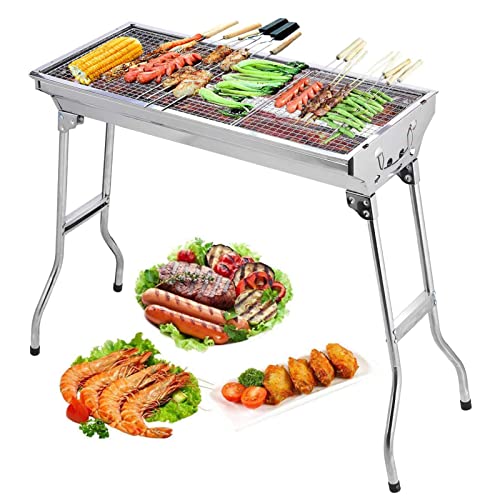
Choosing the right portable grill
When choosing the right portable grill, it is important to consider several factors such as size, fuel type, and cooking surface. Firstly, determine the size that suits your needs. If you plan on using the grill for small gatherings or camping trips, a compact and lightweight option would be ideal. On the other hand, if you often host larger gatherings, a grill with a larger cooking area would be more suitable.
Secondly, determine the fuel type that best suits your preferences. Portable grills typically use propane, charcoal, or electric as fuel sources. Propane grills are popular due to their convenience and quick heat-up times. Charcoal grills, on the other hand, provide a smoky flavor but require more time and effort to set up. Electric grills are the most convenient option as they heat up quickly and are easy to use.
Lastly, consider the cooking surface of the grill. Make sure it is large enough to accommodate the amount of food you plan on cooking. Additionally, check if the cooking grates are made of durable materials like stainless steel or cast-iron, as they will be able to withstand high temperatures and provide even heat distribution.
Overall, choosing the right portable grill requires careful consideration of size, fuel type, and cooking surface. By keeping these factors in mind, you can select a grill that suits your specific needs and ensures a great grilling experience no matter where you go.


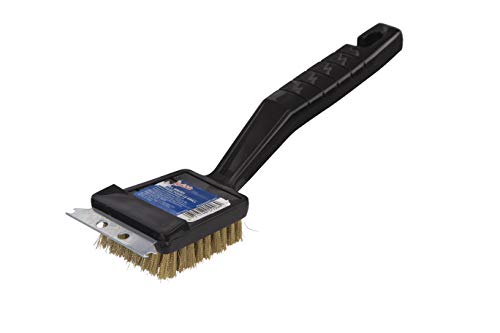
Prepping the grill
To clean and prepare your portable grill before each use, follow these instructions:
- Scrape off any leftover debris: Start by using a grill brush or scraper to remove any remaining food particles or ash on the cooking surface. This will help prevent them from sticking to your food and affecting the taste.
- Wash the grates: Use warm soapy water and a sponge or cloth to thoroughly clean the grates. Make sure to remove any grease or residue, and rinse them off with clean water afterward.
- Dry thoroughly: After cleaning, ensure that the grates are completely dry before reattaching them to the grill. Moisture can lead to rust and affect the grill’s performance.
- Check for gas leaks (if applicable): If you’re using a gas grill, it’s essential to ensure there are no gas leaks before lighting it. You can do this by applying a soapy water solution to the gas connections and hoses. If you see any bubbles forming, there might be a leak. In that case, refrain from using the grill and address the issue before proceeding.
Properly seasoning the cooking surface is also important to enhance the flavor and prevent food from sticking. Here’s how you can do it:
- Apply cooking oil: Use a brush or a paper towel to apply a thin layer of cooking oil, such as vegetable or canola oil, to the clean cooking grates. Ensure that the entire surface is coated evenly.
- Preheat the grill: Ignite the grill and heat it to a high temperature for about 15-20 minutes. This will allow the oil to bond with the metal and create a non-stick surface.
- Let it cool down: After preheating, turn off the grill and let it cool before wiping off any excess oil with a clean cloth or paper towel.
By following these cleaning and seasoning steps, you’ll ensure that your portable grill is ready for a successful and enjoyable grilling experience every time.

![Comfy Package, 12 Inch Bamboo Wooden Skewers For Shish Kabob, Grilling, Fruits, Appetizers and Cocktails [100 Count]](https://m.media-amazon.com/images/I/41RLbhHTQyL.jpg)

Preparing the food
To properly prepare different types of food for grilling, follow these simple steps:
- Marinating: Marinating adds flavor and tenderizes the food. In a bowl, combine your choice of marinade ingredients such as olive oil, garlic, herbs, and spices. Place the food (meat, poultry, seafood, or vegetables) in a resealable plastic bag or shallow dish, and pour the marinade over it. Ensure the food is coated evenly, seal the bag or cover the dish, and refrigerate for the recommended time (as specified in the recipe or marinade instructions).
- Seasoning: Seasoning enhances the taste of the grilled food. Before grilling, generously sprinkle or rub your preferred seasoning on both sides of the food. Common seasonings include salt, pepper, paprika, cumin, or a combination of herbs and spices. Let the seasoning sit on the food for a few minutes to allow it to penetrate.
- Cutting Techniques: Proper cutting techniques are crucial for even cooking and presentation. When preparing meat or poultry, use a sharp knife to remove any excess fat or connective tissue. For tender cuts, like steaks, score the surface in a crisscross pattern to enhance flavor absorption. Ensure the food is cut into uniform sizes to ensure even cooking. For vegetables, slice them into appropriate shapes and sizes, ensuring they are not too thick or thin to prevent burning or overcooking.
Remember, proper preparation goes a long way in enhancing the taste, texture, and overall grilling experience. So, take your time to marinate, season, and cut your food properly, ensuring the best results on the grill. Happy grilling!

Lighting the grill
Lighting a portable grill can be done using different methods, depending on the type of fuel your grill uses. Here are three common methods for lighting a grill: using charcoal, propane, or electric starters.
To light a charcoal grill, begin by arranging your charcoal briquettes in a pyramid shape at the center of the grill. Next, grab a few sheets of newspaper and crumple them up, then place them in the bottom of the grill. Take a long match or lighter and carefully light the newspaper. Make sure to stand back when lighting it up to prevent any accidents. After the newspaper is lit, the flames will slowly spread to the charcoal. Wait for the charcoal to turn into a light gray color before starting to cook your food.
For a propane grill, the first step is to open the lid and make sure all the burner knobs are turned off. Locate the propane tank and make sure the valve is fully closed. Connect the propane tank to the grill, ensuring a tight connection. Once connected, open the lid of the grill and turn the gas burner knobs to the “ignite” position. You can either use an automatic starter button or manually light the burners with a long match or lighter. If using a match or lighter, carefully ignite the flame near the burner holes while holding the match or lighter handle. Once the burners are lit, you can adjust the flame to the desired temperature.
If your grill has an electric starter, the process is relatively simple. Ensure that the grill is plugged into a power source and turn the control knob to the “light” or “ignite” position. The electric starter will generate a spark, which will ignite the gas or charcoal, depending on the type of grill. Once you see the flame, you can adjust the temperature to your liking.
Remember to always follow the manufacturer’s instructions and proper safety precautions when lighting your grill.


Grilling techniques
Direct Grilling
Direct grilling is a popular technique for cooking smaller and tender cuts of meat, such as steaks, burgers, and kebabs. To get started, preheat your grill to high heat. Season your meat with salt and pepper, and brush it with a little oil to prevent sticking. Place the meat directly over the flame or heat source. Remember to keep a close eye on it and flip it halfway through the cooking time to ensure even cooking. This method provides a beautiful sear and crust, while maintaining a juicy and flavorful interior.
Indirect Grilling
Indirect grilling is ideal for larger cuts of meat that require longer cooking times, like whole chickens, roasts, or ribs. First, preheat your grill for indirect cooking by heating one side only. Season your meat as desired and place it on the unheated side of the grill. Close the lid and let the heat circulate around the meat, giving it a slow and even cooking process. It’s important to monitor the grill’s temperature and adjust the burner or charcoal placement to maintain a consistent heat level. This method allows the meat to cook gently, resulting in a moist and tender texture.
Grilling with a Grill Basket or Foil Packet
Grilling baskets and foil packets are excellent methods for cooking vegetables, delicate seafood, or smaller items like shrimp or diced chicken. Start by preheating your grill as usual. For a grill basket, simply place your prepared vegetables or seafood in the basket, and then place the basket directly on the grill grates. Toss or stir occasionally to ensure even cooking. The basket prevents smaller items from falling through the grates while still allowing the heat to reach them.
Alternatively, for a foil packet, take a sheet of heavy-duty aluminum foil and place your ingredients in the center. Fold the sides of the foil, creating a sealed packet. Make sure to leave some room for the heat to circulate. Place the packet directly on the grill and cook according to the recipe’s instructions. The packet helps to steam the ingredients, resulting in a moist and flavorful dish.
By exploring these various grilling techniques, you’ll be able to elevate your outdoor cooking and enjoy a wider range of delicious grilled dishes. Happy grilling!


Monitoring and serving
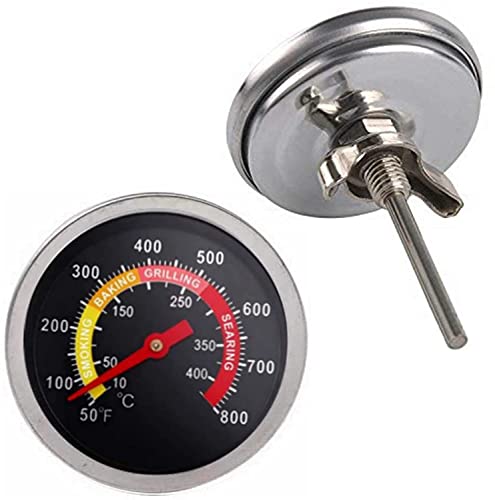
To monitor the cooking process effectively, you can use a meat thermometer. Insert the thermometer into the thickest part of the meat without touching any bone. Ensure that it is placed away from the flame or any direct heat source. This will help you gauge the internal temperature of the food accurately and prevent undercooking or overcooking.
Once the food is cooked to your desired level, it’s important to remove it from the grill safely. Always use heat-resistant oven mitts or gloves to protect yourself from burns. Use long-handled tongs or spatulas to carefully lift the food off the grill. Place it on a clean platter or cutting board to rest before serving. Keep in mind that the grates of the grill will still be hot, so avoid placing the food directly on them after removing from the grill.
When it comes to serving the grilled food, you have multiple options depending on your preference and the type of food. Consider serving it on a large platter for a casual family-style presentation. Alternatively, you can plate individual servings for a more formal setup. Garnish the grilled food with fresh herbs, lemon wedges, or sauce to enhance the flavors and presentation.
Remember to let the food rest for a few minutes before cutting or slicing it. This allows the juices to redistribute, resulting in juicier and more flavorful meat. Make sure to serve the grilled food while it’s still hot for the best taste and texture.
Enjoy your grilled masterpiece and savor the delicious flavors you’ve created!
Final Thoughts
In conclusion, the key to successfully cooking different types of food on a portable grill lies in two factors: selecting the right grill and employing appropriate grilling techniques. Throughout this guide, we have stressed the significance of considering factors such as size, fuel type, and heat control when choosing a portable grill. Furthermore, we have provided insights into various cooking methods and temperatures that suit different types of food. By following these recommendations, you can ensure that your portable grill yields delicious and perfectly cooked meals every time. So whether you’re grilling burgers, seafood, vegetables, or even desserts, remember to make an informed grill selection and apply the appropriate techniques for best results. Happy grilling!